
Connect Claude or Another AI Assistant to PlanItNine
Your AI assistant can read and write your PlanItNine lists. Ask it to plan your day, add a task, or tell you where the week went. It uses the same tasks you see in the app.
Step 1: Get an API key
An API key is a password made for programs. It lets the assistant act as you. Make one key for each assistant. Then you can switch one off without touching the others.
- Log in at app.planitnine.com/account.
- Scroll to API Keys.
- Click + New API Key.
- Name it after the assistant, for example
ClaudeorGrok. - Pick the permissions. Read lets it see tasks. Write lets it add and change tasks. Add Delete only if you want it to delete tasks.
- Click Create Key. Copy the key. It starts with
pin_.
Step 2: Connect Claude on the web and your phone
This works on claude.ai and in the Claude phone apps. You need a Claude plan that allows custom connectors.
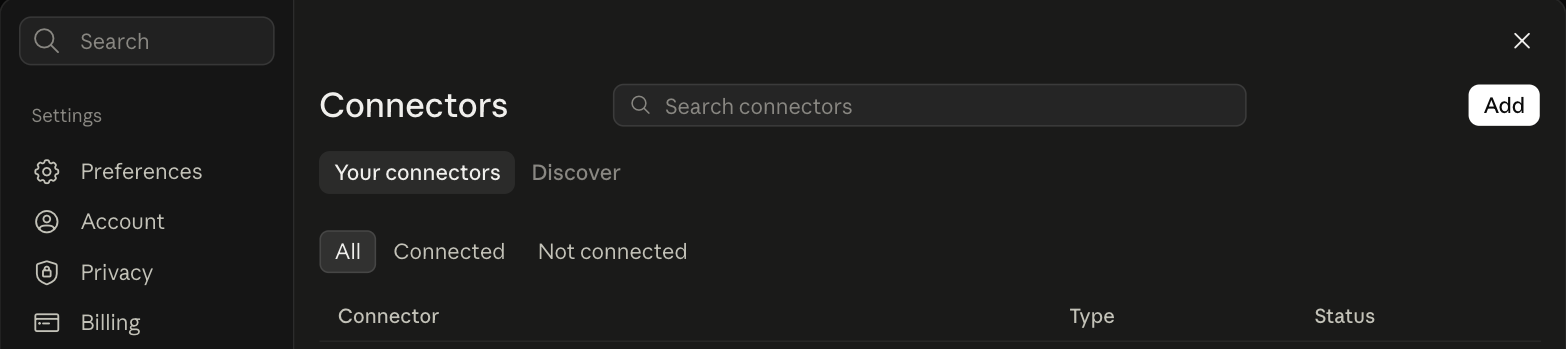
- Open Settings. Under Customize, click Connectors.
- Click Add in the top right.
- Type a name and the server URL. Click Continue.
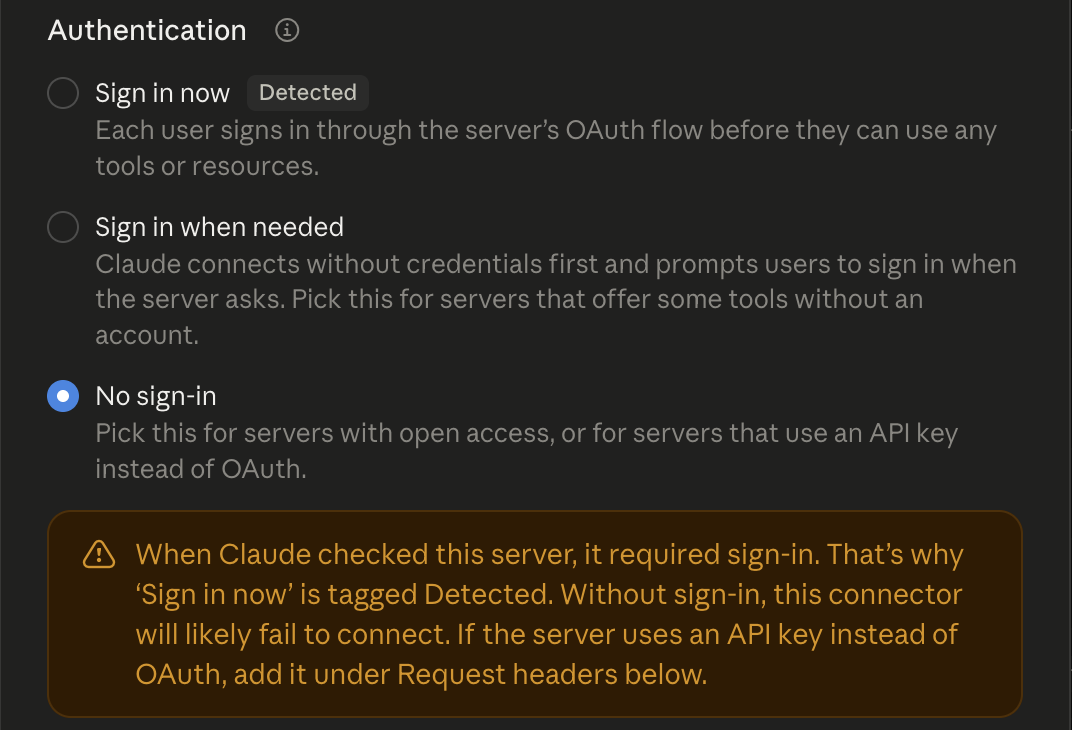
- Under Authentication, pick No sign-in.
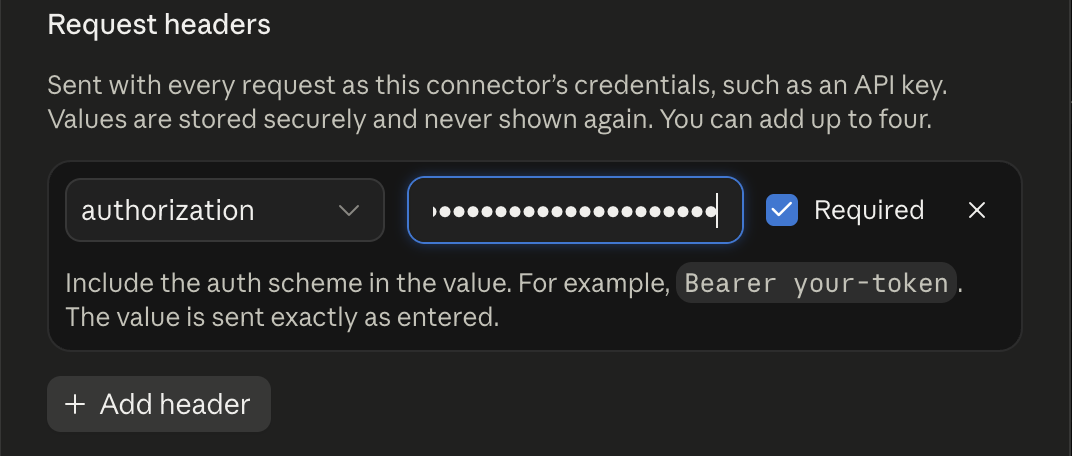
- Click Add header. Fill in the header name and value.
- Click Add.
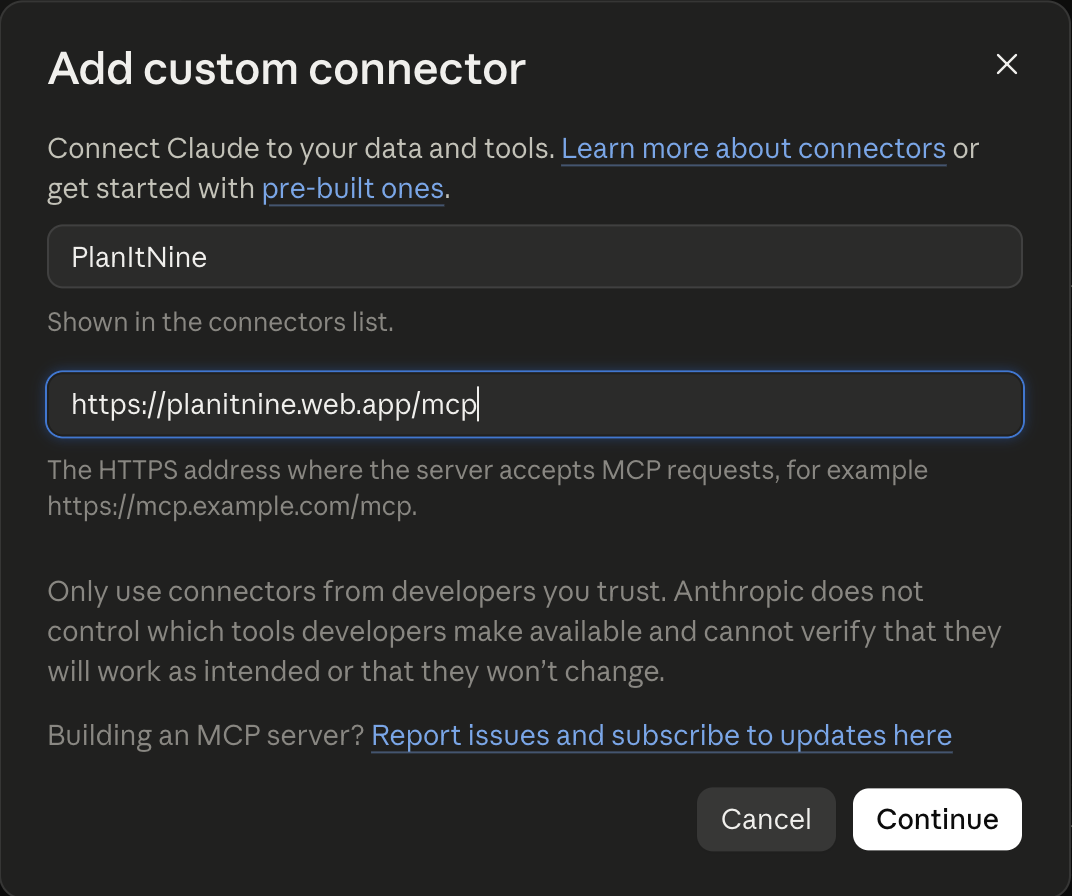
- Remote MCP server URL
https://planitnine.web.app/mcp - Authentication No sign-in
- Header name
authorization - Header value
Bearer pin_your_key_here
Three details matter in the header value:
- The word
Bearer, with a capital B. - One space after it.
- Then your whole key, starting with
pin_.
The header name must be authorization. Pick it from the list. A header named x-api-key is ignored. Leave Required checked.
Set what Claude may do without asking
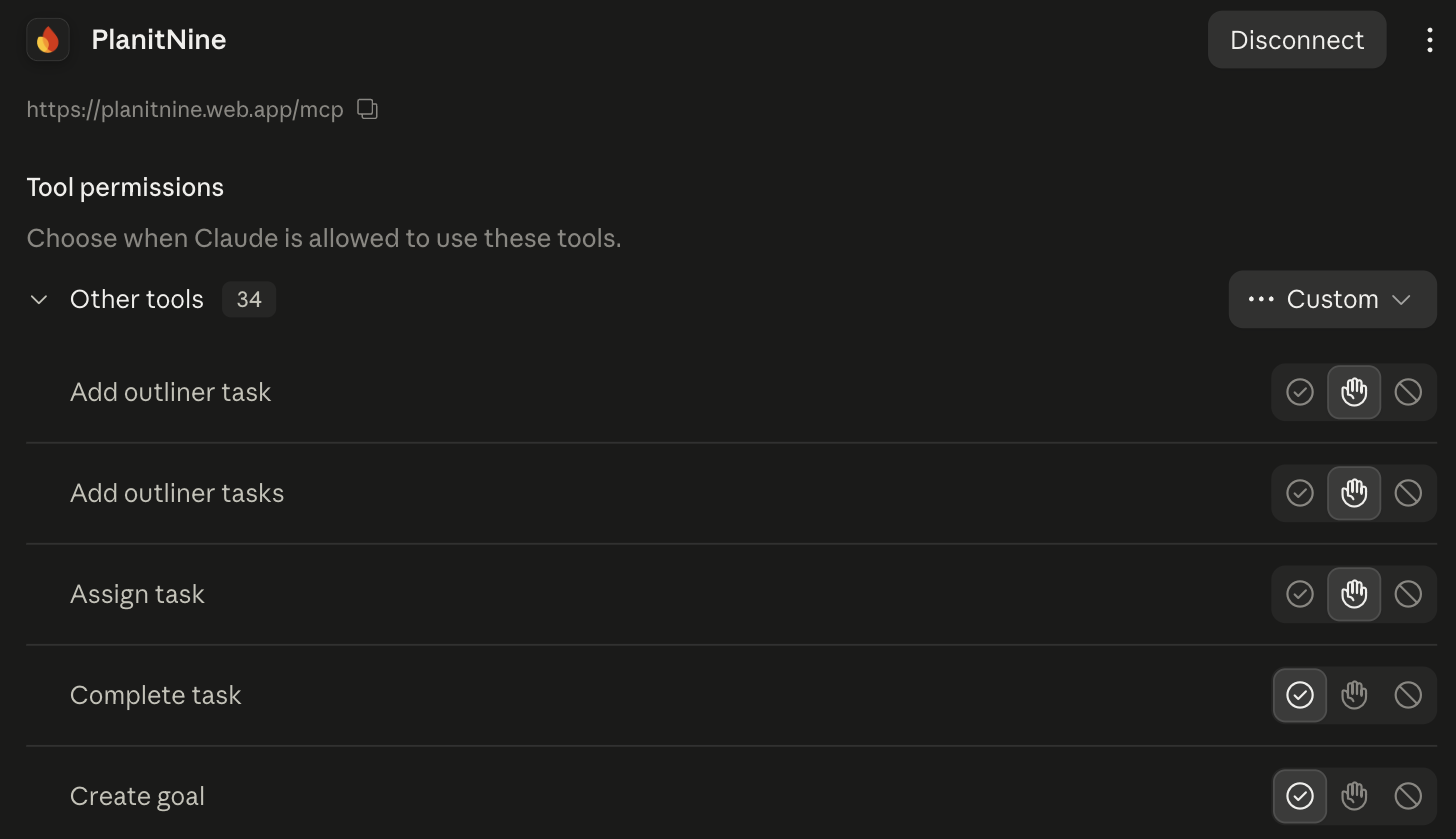
After the connector is added, open it from the Connectors list. Claude shows every tool with three buttons: allow, ask, and block.
- Tools that only read, such as listing tasks and reports: click the check mark (Allow).
- Tools that write, such as create, update, complete and delete: click the hand (Ask) until you trust it.
Step 3: Connect Claude Desktop and Claude Code
Claude Desktop
Claude Desktop shares connectors with your claude.ai account. Add the connector once in Step 2. Then quit and reopen Claude Desktop. PlanItNine shows in the tools menu.
Claude Code
Claude Code is the terminal version of Claude. Run this one command. Put your key in place of pin_your_key_here.
claude mcp add --transport http planitnine https://planitnine.web.app/mcp \
  --header "authorization: Bearer pin_your_key_here"
Then start Claude Code and type /mcp. PlanItNine should show as connected.
Step 4: Connect Grok, Gemini and other assistants
Any assistant that can add a remote MCP server with a custom header works. Grok and Gemini both can. Use the same four facts as Step 2.
- MCP server URL
https://planitnine.web.app/mcp - Authentication API key or none. Not OAuth.
- Header name
authorization - Header value
Bearer pin_your_key_here
Two checks before you start:
- The assistant must let you add a request header. If it only offers OAuth, it can not connect this way. See Step 5.
- The header value must start with
Bearerand one space. Some assistants add this for you when you pick "Bearer token". Do not add it twice.
Step 5: ChatGPT
ChatGPT is not supported yet. ChatGPT connectors only accept OAuth sign in. They do not take an API key. PlanItNine uses an API key, so ChatGPT can not connect on its own.
We are testing a small bridge that does the OAuth sign in and passes your key through. When it passes testing, we will share the code so you can run your own. Check back here.
What your assistant can do
Once connected, your assistant has the same powers as you, within the permissions on the key.
| Area | What it can do |
|---|---|
| Lists | See your lists and what is in each one. |
| Tasks | Add, change, complete, schedule and delete tasks. Set a size (Big, Medium, Small). |
| Today | Read today's plan across every list. |
| Outliner | Add nested tasks, indent and outdent, move and reorder. |
| Goals | Create goals, link tasks to them, and check progress. |
| Time | Weekly work log, where time went, what got done, and budget balance per list. |
| Daily notes | Read and update the notes for a day. |
Sample prompts
Say these in your own words. The assistant works out which tools to call.
Plan the day
- What is on my plan for today in PlanItNine?
- Pick one Big, three Medium and five Small tasks from my Work list for tomorrow and schedule them.
- Move everything I did not finish today to Monday.
Capture fast
- Add "Call the dentist" to my Home list, Small, due Friday.
- Here are my meeting notes. Pull out every action item and add each one to my Work list as a task.
- Break "Launch the newsletter" into five sub-tasks in the outliner.
Review the week
- Give me my work log for this week as a summary I can paste into an email to my manager.
- Where did my time go last week? Group it by list.
- Which lists am I over budget on this month?
Goals
- Show my quarterly goals and how far along each one is.
- Create a monthly goal "Ship version 2" in my Product list and link my open release tasks to it.
Troubleshooting
| What you see | What it means | Fix |
|---|---|---|
| Claude says the connection failed, no details | Authentication was left on "Sign in now". | Remove the connector. Add it again with Authentication set to No sign-in and the header filled in. |
401 or "Unauthorized" |
The header is missing or wrong. | Check the name is authorization, the value starts with Bearer and the key is complete. |
| It worked, now it does not | The key was revoked or expired. | Make a new key on the account page and update the header. |
| The assistant cannot see a list | That list was excluded when the key was made. | Make a new key without the exclusion. |
| It reads but will not write | The key only has Read permission. | Make a new key with Write. Permissions on a key cannot be changed later. |
Remove access
Go to app.planitnine.com/account, find the key under Active Keys, and click Revoke. The assistant loses access right away. Your tasks are not changed.
Related Guides
Plan by chat
Make a free account, create a key, and let your assistant do the typing.
Try PlanItNine Free